A Beginner’s Guide to Using Ready-Made Blocks in Elementor

Never built a website before? No problem. This step-by-step guide walks you through everything you need to know about using ready-made blocks in Elementor without any tech jargon.
If you’ve just installed Elementor and you’re wondering where on earth to begin, you’re in exactly the right place. Building a website from scratch sounds terrifying, but with ready-made blocks, it genuinely isn’t.
This guide is written specifically for beginners. We’ll use real examples and a clear step-by-step approach. By the end, you’ll know exactly how to use ready-made Elementor blocks to build a professional-looking page even if today is your very first day with WordPress.
| This Guide Is For You If…
You’ve just installed WordPress and Elementor, you want to build a simple website (business, portfolio, blog, or store), and you’ve never written a line of code in your life. Welcome, you’re going to be just fine. |
What Are Ready-Made Blocks, Exactly?
Think of your website like a page in a magazine. That page is made up of sections: a big headline at the top, a few paragraphs in the middle, some images on the side, a quote box, maybe a contact form at the bottom. Each of those sections is a block.
A ready-made block is a pre-designed version of one of those sections. Instead of you figuring out how to design it from scratch, choosing fonts, layouts, spacing, colors, someone has already done that work for you. You just pick the one you want, place it on your page, and swap in your own content.
In Elementor specifically, these blocks are called widgets. When you use a plugin like OneClickBlocks, you get a library of professionally designed widgets ready to drag and drop onto any page.
| Did You Know?
The concept of building pages from pre-made “blocks” was inspired by how print designers work. Newspaper layout teams have used modular section grids for over a century. Elementor brought this same efficiency to web design, and addons like OneClickBlocks take it even further by providing the blocks themselves. |
What kinds of blocks exist?
Here are the most common types of blocks you’ll use when building a typical website:
✓ Hero / Banner The big section at the very top of a page with a headline, description, and call-to-action button.
✓ Testimonials Customer reviews and feedback displayed in a visually appealing layout with names, photos, and star ratings.
✓ Services A section that showcases what your business offers, usually with icons, headings, and short descriptions.
✓ Blog Grid A display of your latest blog posts in a clean grid or list layout.
✓ Header & Footer The navigation bar at the top and the links/info section at the bottom of every page.
✓ Callout / CTA An eye-catching section designed to direct visitors to take a specific action, like signing up or buying.
✓ Image Slider A scrollable carousel of images or content cards, great for portfolios or featured products.
What You Need Before You Start
Good news: the setup is simpler than you think. Here’s everything you need in place before you can start using ready-made Elementor blocks:
| Requirement | What It Does | Free? | Beginner Friendly? |
| WordPress | The platform your website runs on. Powers 43% of the web. | ✓ Free | ✓ Yes |
| A Hosting Plan | A server that stores and serves your website to visitors. | Paid | ✓ Easy setup |
| Elementor (Free) | The page builder that lets you design with drag and drop. | ✓ Free | ✓ Yes |
| OneClickBlocks | Adds 10+ essential ready-made widgets to Elementor. | ✓ Free tier | ✓ Yes, designed for beginners |
| A WordPress Theme | Controls the overall look of your site. OneClickBlocks works with any theme. | ✓ Many free options | Tip: Use Hello Elementor (free) |
| Beginner Tip
If you’re just getting started, install the free “Hello Elementor” theme it’s made specifically to work as a blank canvas with Elementor and OneClickBlocks. It loads fast, stays out of the way, and lets the blocks do the talking. You can find it in the WordPress theme directory by searching “Hello Elementor.” |
Step-by-Step: Building Your First Page with Blocks
Let’s walk through the complete process from a blank page to a finished, published section in seven clear steps. You can follow along right now in your own Elementor editor.
- Install OneClickBlocks from the WordPress Plugin Directory
In your WordPress dashboard, go to Plugins → Add New. Search for “OneClickBlocks”. Click Install, then Activate. That’s it. Your new widgets are ready. Takes about 60 seconds - Create a New Page in WordPress
Go to Pages → Add New in your dashboard. Give it a name (like “Home” or “About Us”), then click the blue “Edit with Elementor” button. This opens the Elementor
page builder editor. Super simple. - Find Your OneClickBlocks Widgets in the Panel
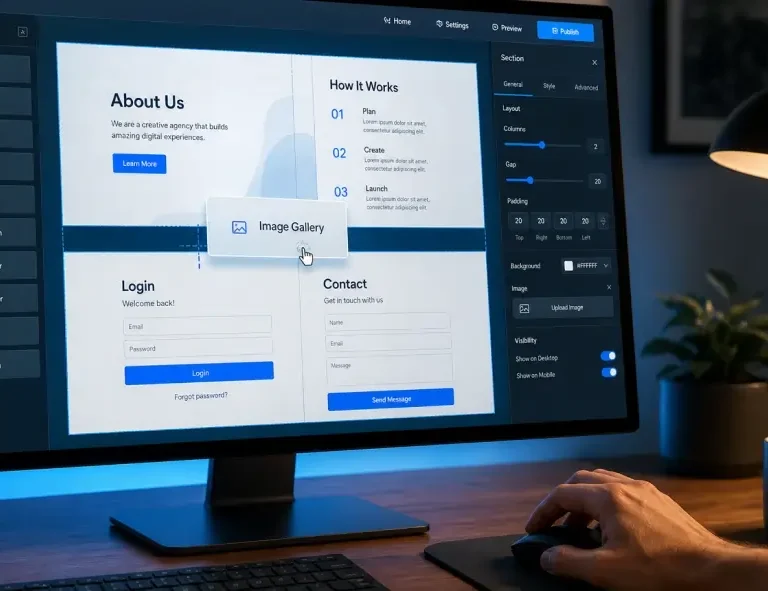
On the left side of the Elementor editor, you’ll see the widget panel. Scroll down, and you’ll find a section called OneClickBlocks. This is where all your ready-made widgets live. You’ll see Testimonials, Blog Posts, Header, Footer, Slider, Callout, and more. Look for the OneClickBlocks logo - Drag a Widget onto Your Page Canvas
Click and hold any widget in the panel, then drag it onto the canvas on the right. Release it and watch the block appear instantly, fully designed and ready for content. Try the Testimonial widget first; it’s the most visually satisfying beginner experience. Your page is taking shape! - Click the Widget to Open Its Settings
Click anywhere on the widget you just placed. The left panel switches to show all its settings, content fields, style controls, and layout options. This is where you’ll customize everything without touching code. - Replace the Placeholder Content with Yours
Change the example text to your own words. Upload your own images. Update names, descriptions, and any links. The widget’s layout, fonts, and colors stay perfectly in place; you’re just filling in the blanks. The fun part! - Hit Publish, and You’re Live
When you’re happy with your page, click the green Publish button at the bottom of the left panel. Your page is now live on the internet. Preview it on desktop, tablet, and mobile; it’ll look great on all three automatically. You just built a page!
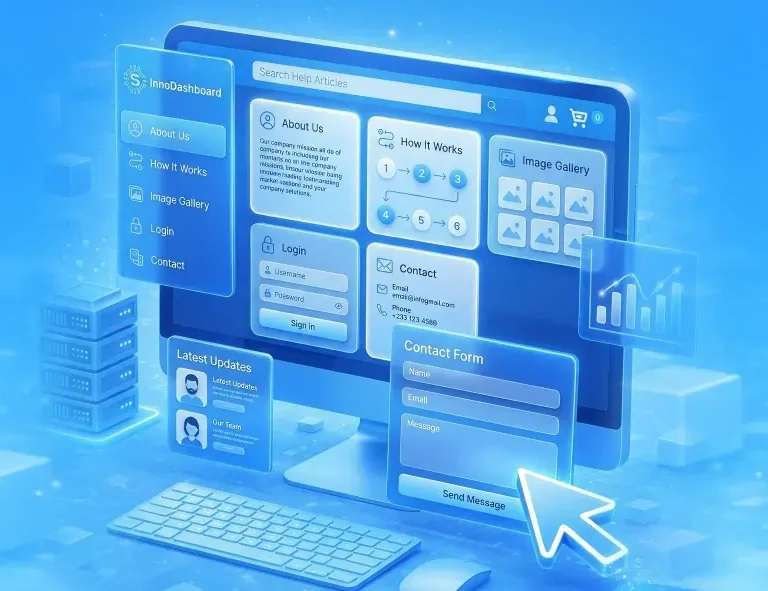
The OneClickBlocks Widgets: A Beginner’s Tour
Once OneClickBlocks is installed, here’s what you have access to. Each widget is designed to be beginner-friendly while looking genuinely professional:
Testimonial Widget: Show reviews from real clients with names, photos, star ratings, and a quote. Builds trust instantly on any page.
Header Builder: Create a custom navigation bar with your logo, menu links, and buttons no theme settings needed.
Blog Posts Widget: Display your latest blog articles in a clean grid or list layout. Great for homepages and blog landing pages.
Slider Widget: A beautiful image or content carousel with smooth transitions and mobile swipe support. No extra plugin needed.
Callout Boxes: Eye-catching message blocks for promotions, announcements, or CTAs. Place them anywhere on a page.
Service Blocks: Showcase what you offer with icons, titles, and short descriptions. Works beautifully for agencies and freelancers.
Footer Builder: Design a custom footer with links, copyright text, social icons, and contact info independent of your theme.
Content Blocks: Pre-designed full-width sections that combine text, images, and layout, perfect for quickly filling out page sections.
How to Customise a Block to Match Your Brand
One of the biggest fears beginners have is: “Will this look too generic? Will my site look like everyone else’s?” The answer is no because every widget in OneClickBlocks is fully customisable. Here’s how to make any block feel uniquely yours:
| Default Block (Out of the Box) | After Your Customisation |
| Generic placeholder text and images | Your actual content, copy, and real photos |
| Default color scheme (neutral grays and whites) | Your brand colors applied throughout |
| Standard font sizes and weights | Your chosen font pairing and sizes |
| Example testimonial names and photos | Real client names, photos, and quotes |
| Preset spacing and padding | Spacing tweaked to your visual preference |
The three customisation tabs every block has
When you click on any OneClickBlocks widget in Elementor, the left panel shows three tabs. As a beginner, these are all you need:
- Content tab: This is where you change all the text, images, links, and data inside the block. Start here every time.
- Style tab: This is where you change colors, fonts, font sizes, borders, shadows, and spacing. Make your brand colors shine here.
- Advanced tab: Controls for margins, padding, animations, and responsive visibility. You won’t need this often as a beginner, but it’s useful for fine-tuning.
| “The details are not the details. They make the design.”
~ Charles Eames, Legendary American Designer & Architect |
This is why the customisation controls in OneClickBlocks matter so much. The block provides the structure; your brand colors, typography, and real content are the details that make it genuinely yours.
Common Beginner Mistakes (and How to Avoid Them)
Every beginner makes a few of these. Knowing them in advance saves you a lot of frustration:
Mistake #1: Using Too Many Different Blocks at Once
Beginners often get excited and add every widget they can find to a single page. The result is visual chaos. Start with 4–6 focused blocks per page. Less is almost always more. A clean Homepage has a hero, a services section, a testimonials block, and a footer that’s it.
Mistake #2: Forgetting to Check Mobile View
Always preview your page in Elementor’s mobile view before publishing. Click the phone icon at the bottom of the editor. OneClickBlocks widgets are responsive by default, but you should always confirm everything looks great on small screens before going live.
Mistake #3: Leaving Placeholder Text in Your Live Page
It happens more than you’d think. Always do a final read-through of every block on your page before publishing. Look for any “Lorem Ipsum” placeholder text, example email addresses, or dummy images that need replacing.
Mistake #4: Installing Multiple Plugins That Do the Same Thing
Many beginners install five separate plugins one for testimonials, one for sliders, one for a blog grid when one well-chosen add-on does all of it. OneClickBlocks gives you all the essential widgets in a single, lightweight plugin, which keeps your site fast and conflict-free. One plugin, everything you need.
Are you ready to start building?
Building a website used to require a developer, weeks, and thousands of pounds. Today, with the right tools, a complete beginner can build a beautiful, professional website in an afternoon. Ready-made blocks in Elementor, especially with OneClickBlocks, make that possible.
The only thing left to do is start. Install OneClickBlocks, open Elementor, and drag your first widget onto a page. The moment you see that first block appear fully designed and ready for your content, everything clicks. You’ll realise that building a website really can be this straightforward.
Your website is waiting. And now you know exactly how to build it.