
The OneClickBlocks Counter Widget is a powerful Elementor widget that lets you display animated milestone statistics — such as years of experience, clients served, and projects completed — in a visually engaging counter section. With multiple pre-built layout styles, customizable icons or images, and a fully editable content area, this widget helps you build trust and highlight your brand’s achievements without writing a single line of code. It is fully responsive and designed to work seamlessly on all devices.
Go to your WordPress Dashboard and navigate to OneClickBlocks → Elements. Find the Counter Widget in the list, toggle it to Enable, and click Save Settings. Once activated, open any page in Elementor, search for counter in the widget search bar, and drag the Counter widget (with the OneClickBlocks icon) into your desired section.
After placing the widget on your page, click on it to open the Edit Counter panel on the left. All settings are organized under the Content tab. Below is a complete reference for every available setting.
The Counter Style section controls the overall visual layout of the counter section. Use the Counter Layout dropdown to choose from multiple pre-designed layout styles — for example, Layout 1 displays counters as bold blue cards in a grid, Layout 3 places the title on the left with cards on the right, Layout 4 arranges all counters in a single horizontal row, Layout 5 uses a split card design, and Layout 6 displays counters in rounded pill/blob shaped cards. Each layout changes the visual structure of the entire counter section instantly.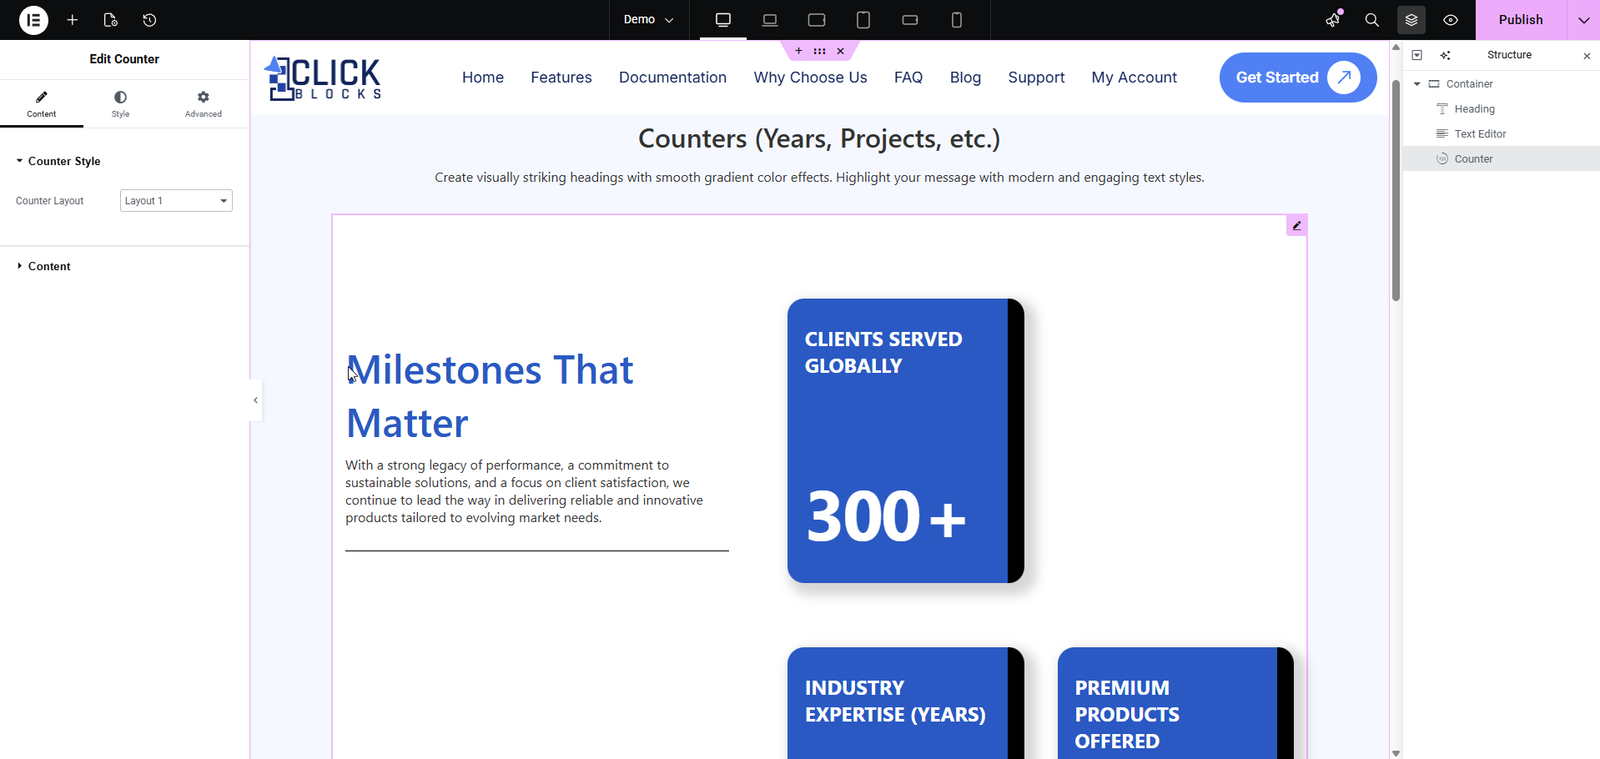
This toggle controls the visibility of the main section heading and description text displayed alongside the counter cards. Set it to Show to display the title and description, or Hide to show only the counter cards. This is useful when you want a minimal stat-only layout.
Enter the main heading for the counter section in this field. This text appears as the primary title above or beside the counter cards depending on the selected layout. For example, you might enter Milestones That Matter or Driving Innovation, Earning Trust.
This is a rich text editor where you can write a supporting paragraph or description for the counter section. It supports basic formatting such as bold, italic, underline, and links. This description appears below the section title and provides context for the statistics being displayed.
This toggle controls whether the individual counter cards are visible on the frontend. Set it to Show to display all counter cards, or Hide to temporarily remove them without deleting the data. This is helpful for previewing the layout with only the section title and description visible.
The Counter Items section is a repeater that contains all your individual stat cards. You can add, reorder, duplicate, or delete items here. Note: The widget supports a maximum of 4 counter cards. Any additional cards beyond 4 will not be visible on the frontend. Each counter item contains the following fields:
Enter the label or name for this specific counter card. This text appears below or alongside the counter number depending on the layout. For example, enter Clients Served Globally, Industry Expertise (Years), or Projects Delivered Successfully. This field supports the expand/collapse arrow icon to quickly rename items from the panel.
Set the numeric value that will be displayed on this counter card. The accepted range is a minimum of 0 and a maximum of 1000. For example, enter 300 to display 300+ on the card. The “+” suffix is automatically appended by the widget on the frontend.
This toggle switches between using an icon (from the icon library) or a custom image (uploaded from your media library) to represent this counter card visually. Use the icon library button to pick from available icon sets, or switch to image mode and upload a custom graphic. Icons and images appear at the top of each counter card in most layouts.
When the Card Icon / Image toggle is set to image mode, this field allows you to upload or select an image from your WordPress Media Library to display on the counter card. This is useful if you have custom branded icons or illustrations you want to use instead of icon library icons.
Click the + Add Item button at the bottom of the Counter Items list to add a new counter card. Fill in the Card Title, Card Counter Number, and Card Icon/Image for each new item. Remember that only up to 4 items will be displayed on the frontend.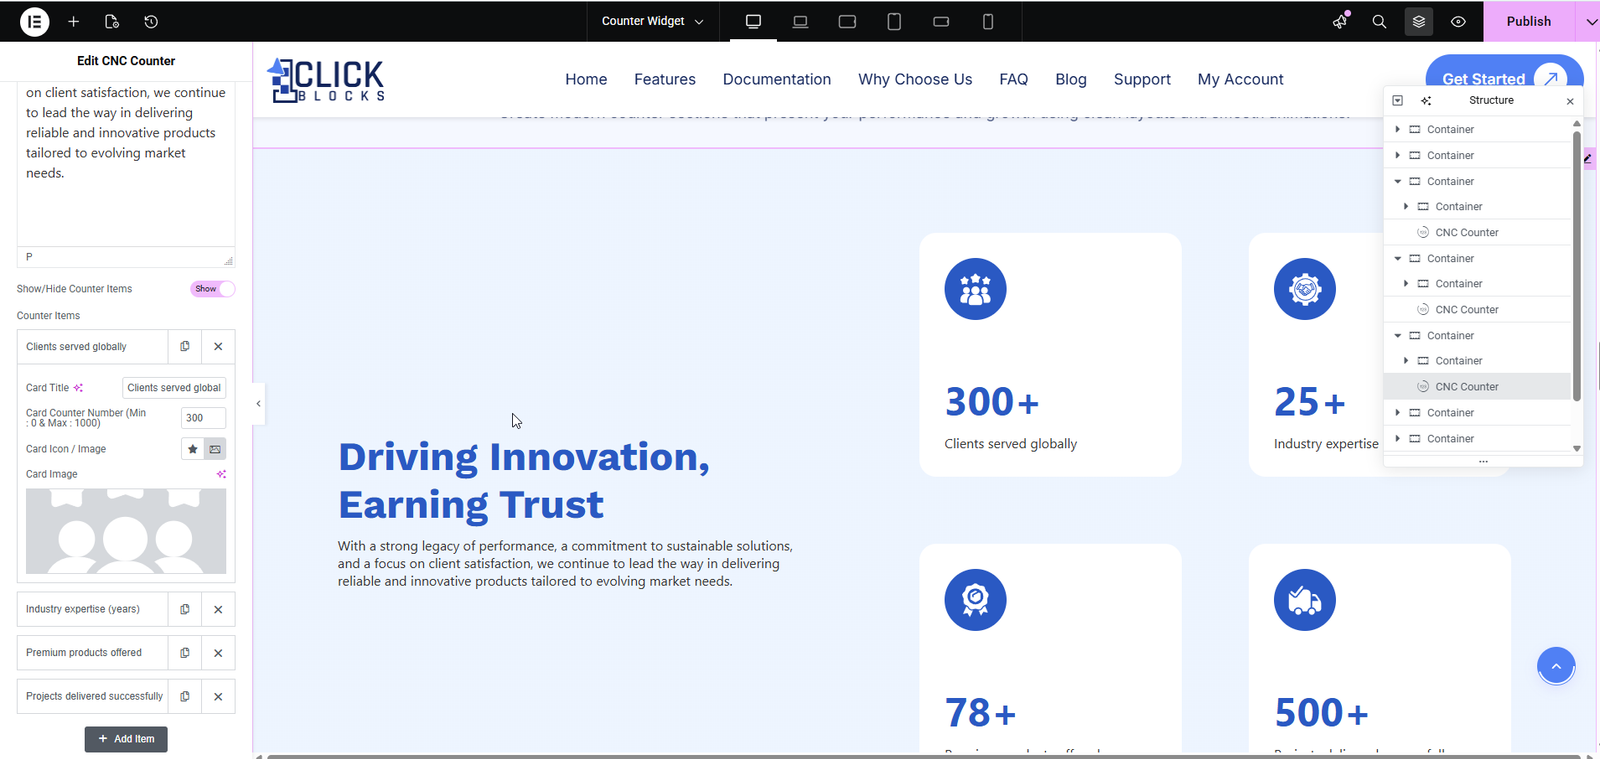
Each counter item in the repeater list has two action buttons on the right side:
Duplicate (copy icon) — Creates an exact copy of that counter item below the original. This is useful when multiple cards share similar settings and you only need to change the title or number.
Delete (× icon) — Permanently removes that counter card from the list. This action cannot be undone within the same session, so use it carefully.
Once you have finished configuring all settings, click the Publish or Update button in the top-right corner of Elementor to save and apply your changes to the live page.