The Restaurant Menu Widget by OneClickBlocks is a powerful Elementor widget that lets you display a professional, fully customizable restaurant menu directly on your WordPress website — no coding required. Whether you want a clean tab-based menu, an elegant full-page layout, a visually rich image slider, or a simple embedded PDF menu, this widget covers every use case. It is ideal for restaurants, cafes, food businesses, and hospitality websites looking to present their menu in a structured and attractive way inside the Elementor page builder.
Before you can use the Restaurant Menu Widget, you need to activate it from the OneClickBlocks settings panel. Follow these steps:
Step 1: Log in to your WordPress Dashboard.
Step 2: In the left sidebar, navigate to OneClickBlocks → Elements.
Step 3: Find the Restaurant Menu widget in the list and toggle it to Enable.
Step 4: Click Save Settings to apply the change.
Step 5: Open any page or post in Elementor by clicking Edit with Elementor.
Step 6: In the Elementor left panel, click the “+” (Add Elements) button or use the search bar and type “Restaurant Menu” to locate the widget.
Step 7: Drag and drop the Restaurant Menu widget into any container or section on your page canvas.
The widget will immediately render with default demo content, which you can fully customize using the Content settings in the left panel.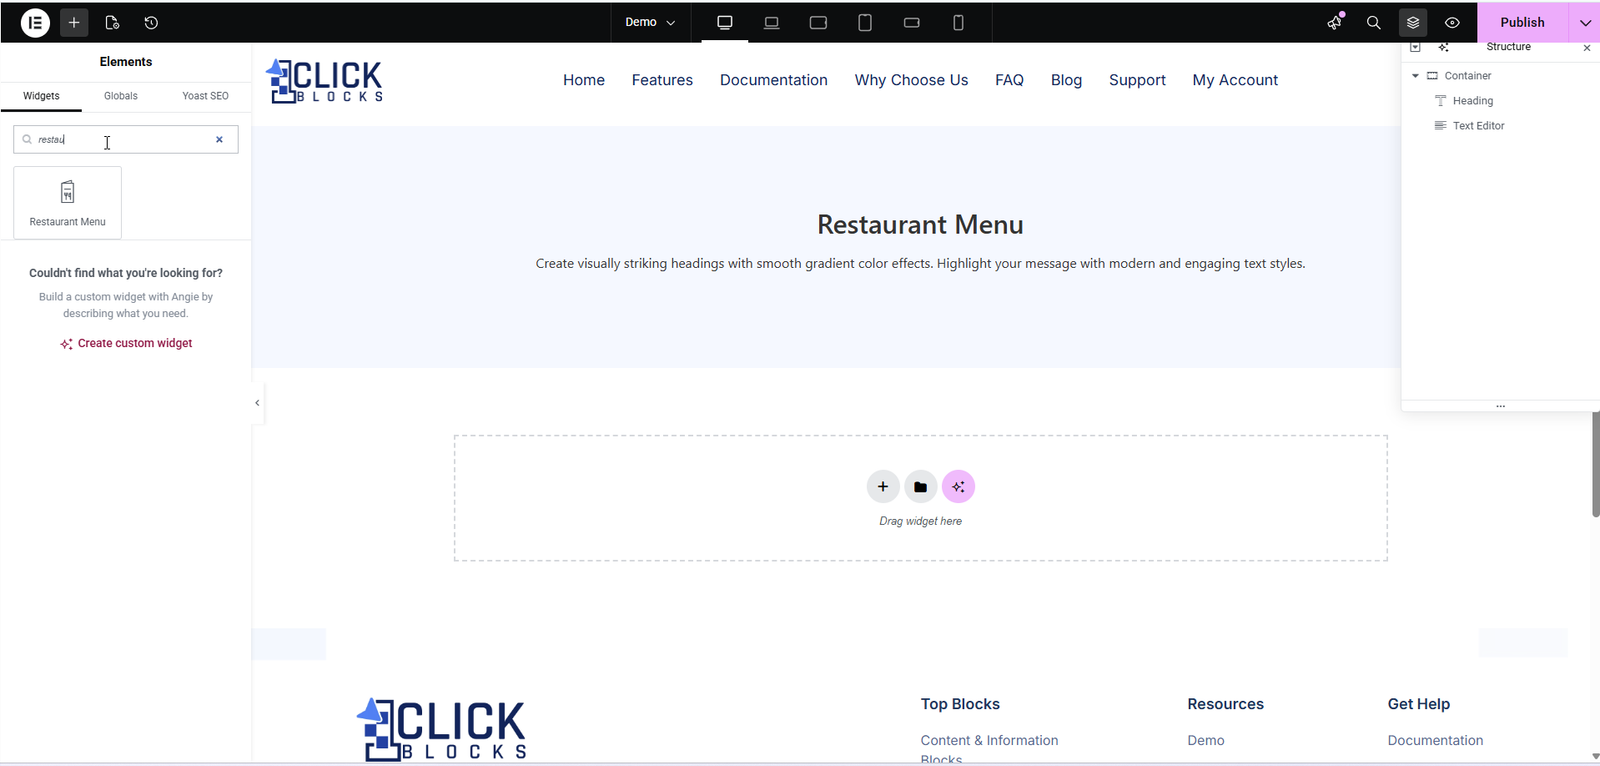
Once the widget is placed on the canvas, click on it to open its settings in the left panel. All content options are available under the Content tab. The available settings change depending on the layout you select.
This dropdown lets you choose between four distinct pre-built display styles for your menu. Switching layouts instantly updates the live preview on the canvas without losing your content. The four available layouts are:
Layout 1 — A clean, tab-based menu. Categories appear as clickable filter buttons (e.g., Breakfast, Lunch, Dinner). Clicking a tab shows only the items belonging to that category. Items are shown in a side-by-side two-column grid with name, price, and description.
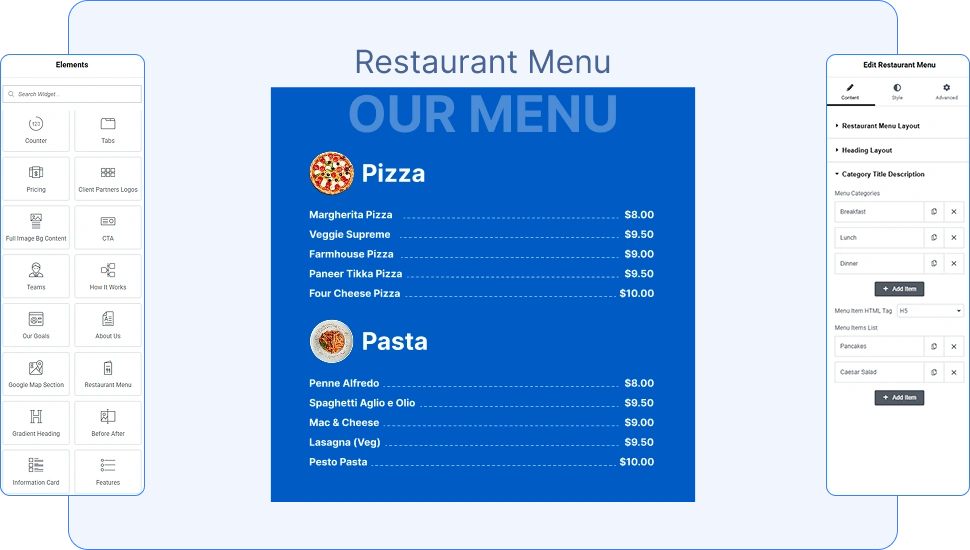
Layout 2 — A bold, full-page static menu with a solid blue background. All categories and their items are displayed vertically in a single scrollable block. Best suited for a classic, formal menu presentation.
Layout 3 — A full-page menu in a lighter pastel-blue theme, combined with a horizontal image slider section below. Food items are displayed as circular image cards with scalloped yellow-gold borders, a title, description, and price badge. Ideal for visually showcasing featured or special dishes.
Layout 4 — A PDF-based menu display. Instead of entering items manually, this layout lets you upload your existing menu as a PDF file, which is rendered inline using an embedded PDF viewer with page navigation and zoom controls.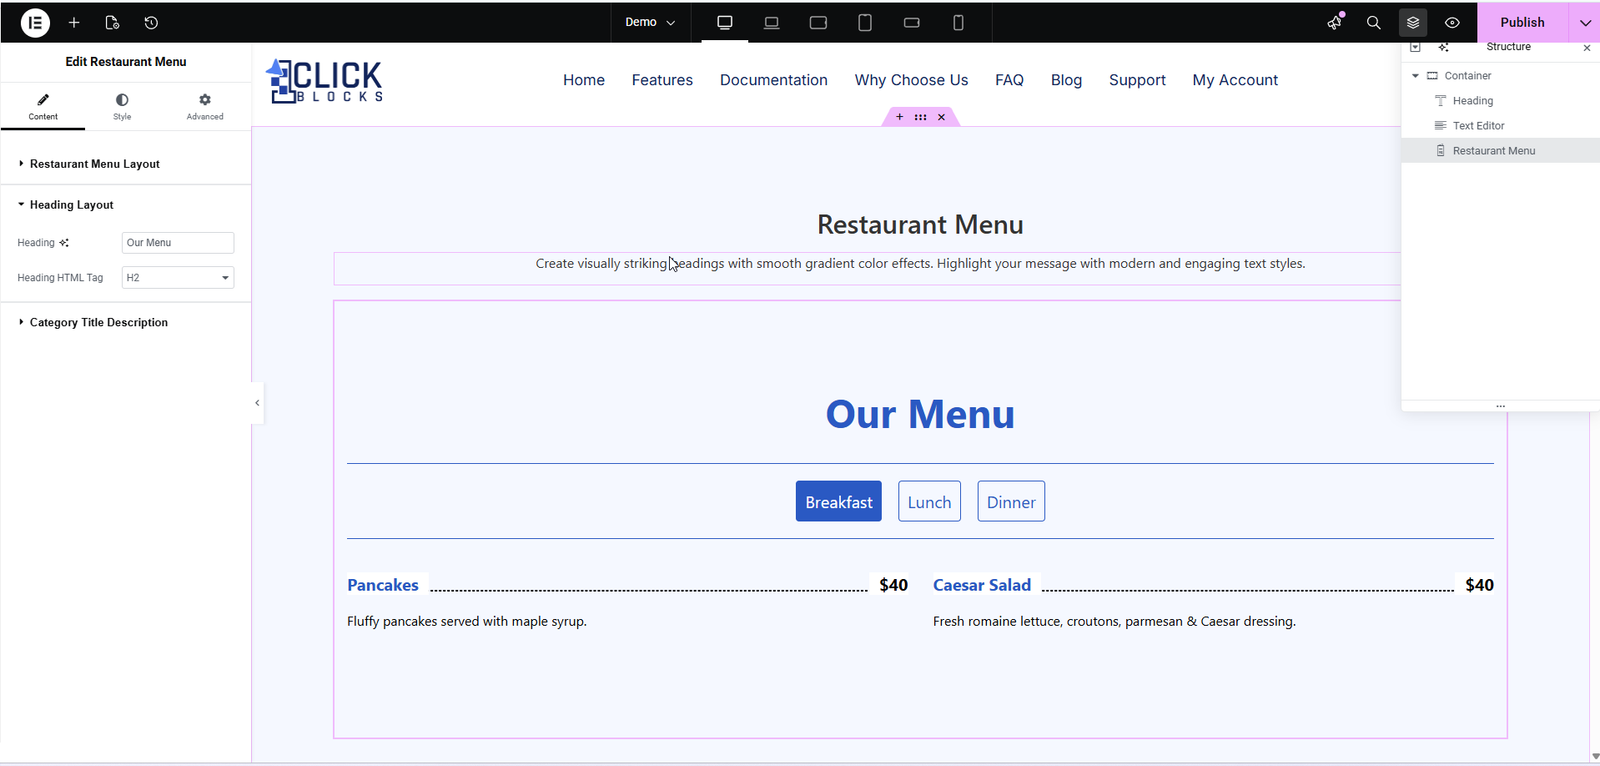
This section controls the appearance of the main menu heading displayed on the canvas (e.g., “Our Menu” or “OUR MENU”). Options here adjust the heading style to match the selected layout’s visual design.
This section is available in Layout 1 and Layout 2. It controls the list of menu categories that appear as tab labels or section headings. Use this section to define all the categories your menu is organized into.
This is a repeater field where you add, remove, or reorder your menu category labels. Each category item represents one tab (in Layout 1) or one section heading (in Layout 2). Click + Add Item to create a new category. You can also duplicate or delete existing ones using the icons next to each entry.
Example values: Breakfast, Lunch, Dinner, Desserts, Drinks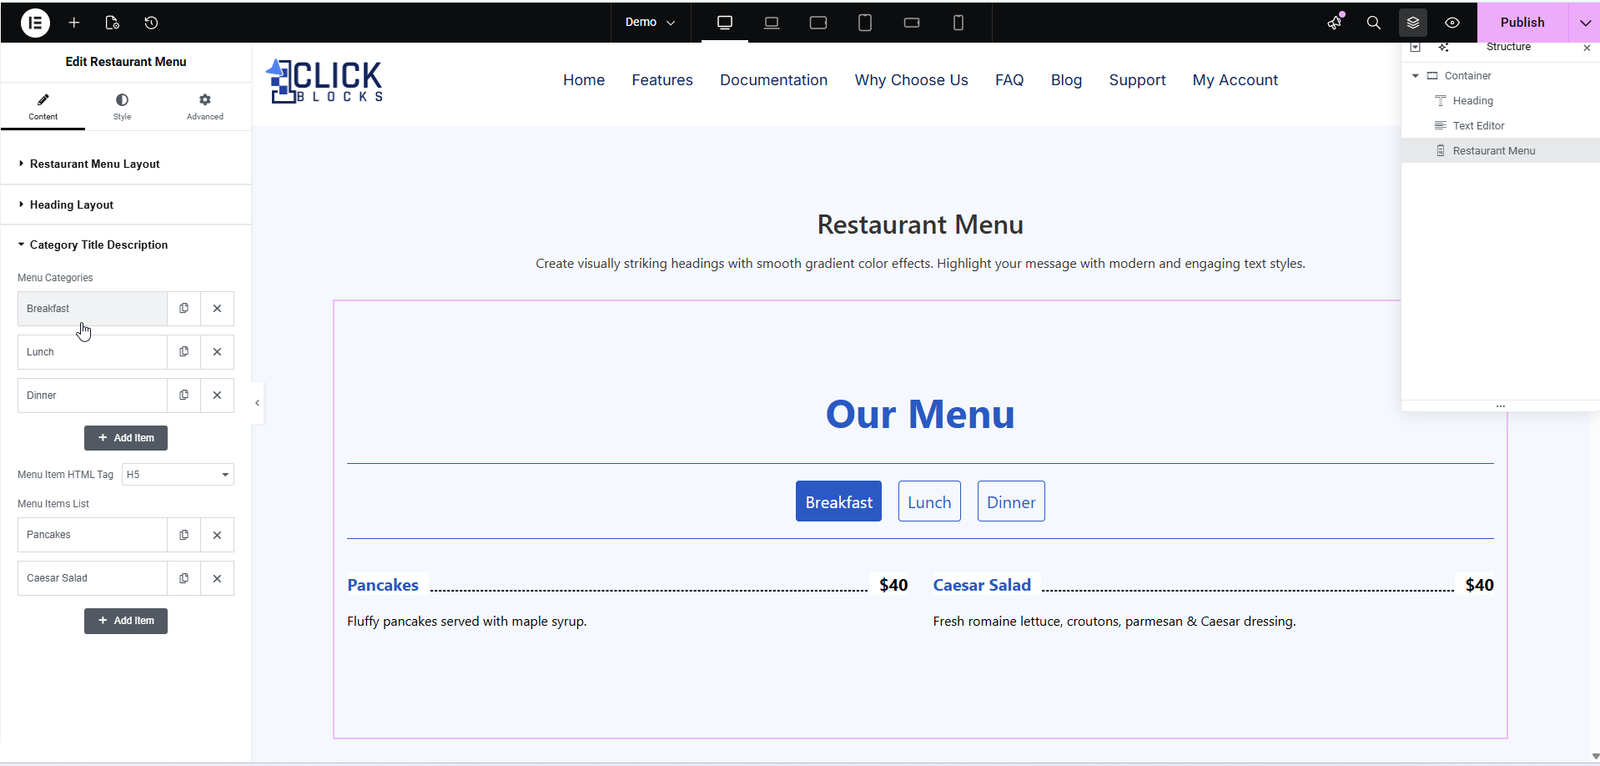
This dropdown lets you set the HTML heading tag used for each menu item name on the front end. Choosing the correct tag is important for SEO and accessibility. The default value is H5.
Example values: H3, H4, H5, H6
This is the core repeater where you add all the individual dishes or items for your menu. Each item in the list can be expanded to reveal its own set of fields. Click + Add Item to add a new dish. The fields available for each menu item are described below.
Enter the name of the dish or menu item. This is displayed as the primary label for that item on the front end.
Example: Pancakes, Caesar Salad, Grilled Salmon
Enter the price of the menu item. You can include a currency symbol directly in this field.
Example: $40, €15, ₹299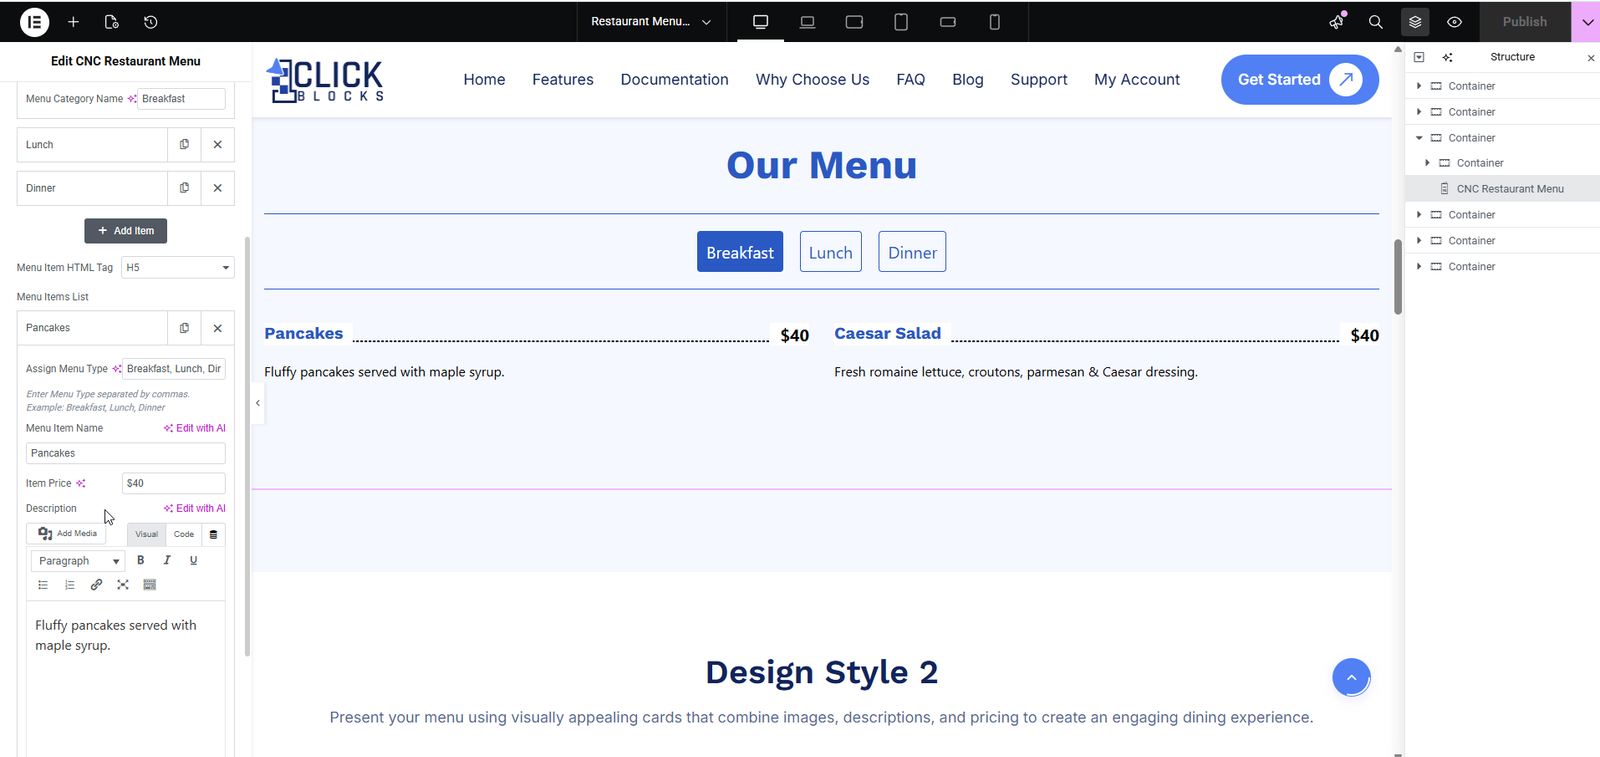
This field controls which category tab(s) this item belongs to. Enter the category names as a comma-separated list, exactly matching the labels defined in the Menu Categories section. An item can be assigned to multiple categories.
Example: Breakfast, Lunch, Dinner
A rich text editor where you can enter a short description for the menu item. This text appears below the item name and price on the canvas. Basic formatting such as bold, italic, and links is supported.
Example: Fluffy pancakes served with maple syrup.
Available in Layout 3. This section lets you customize the previous and next navigation icons used in the menu slider section. You can replace the default arrows with custom icons to match your site’s branding.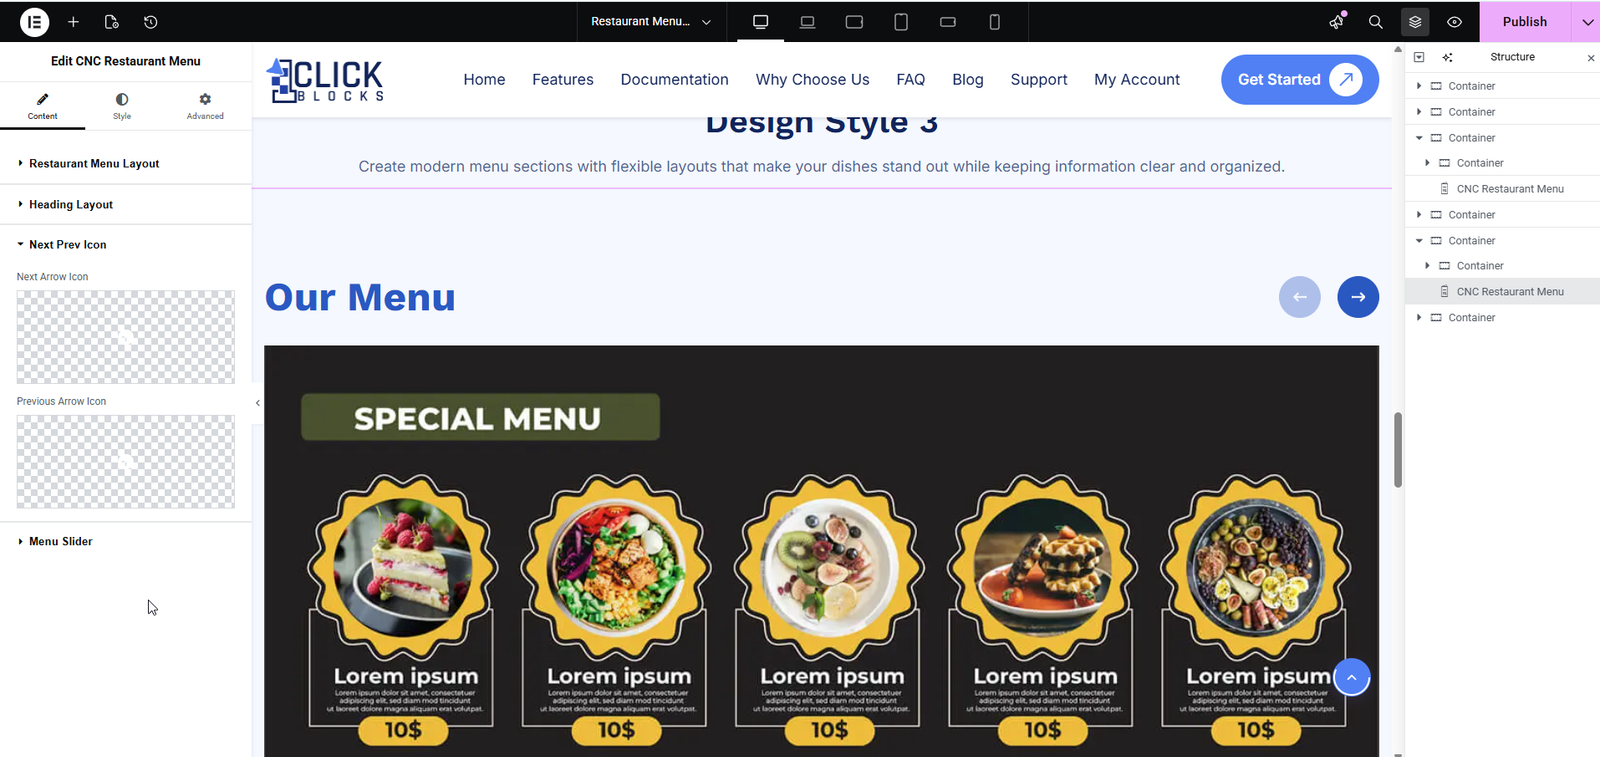
Available in Layout 3. This section controls the image-based food card slider displayed below the main menu. It is a repeater field where each slide represents one featured dish card.
Each slide entry represents a single food card shown in the slider. Add, duplicate, or remove slides using the controls next to each item. For each slide you can configure:
Slider Image — Upload or select an image from the WordPress media library to be displayed inside the circular food card frame. This is the main visual element of the slide card.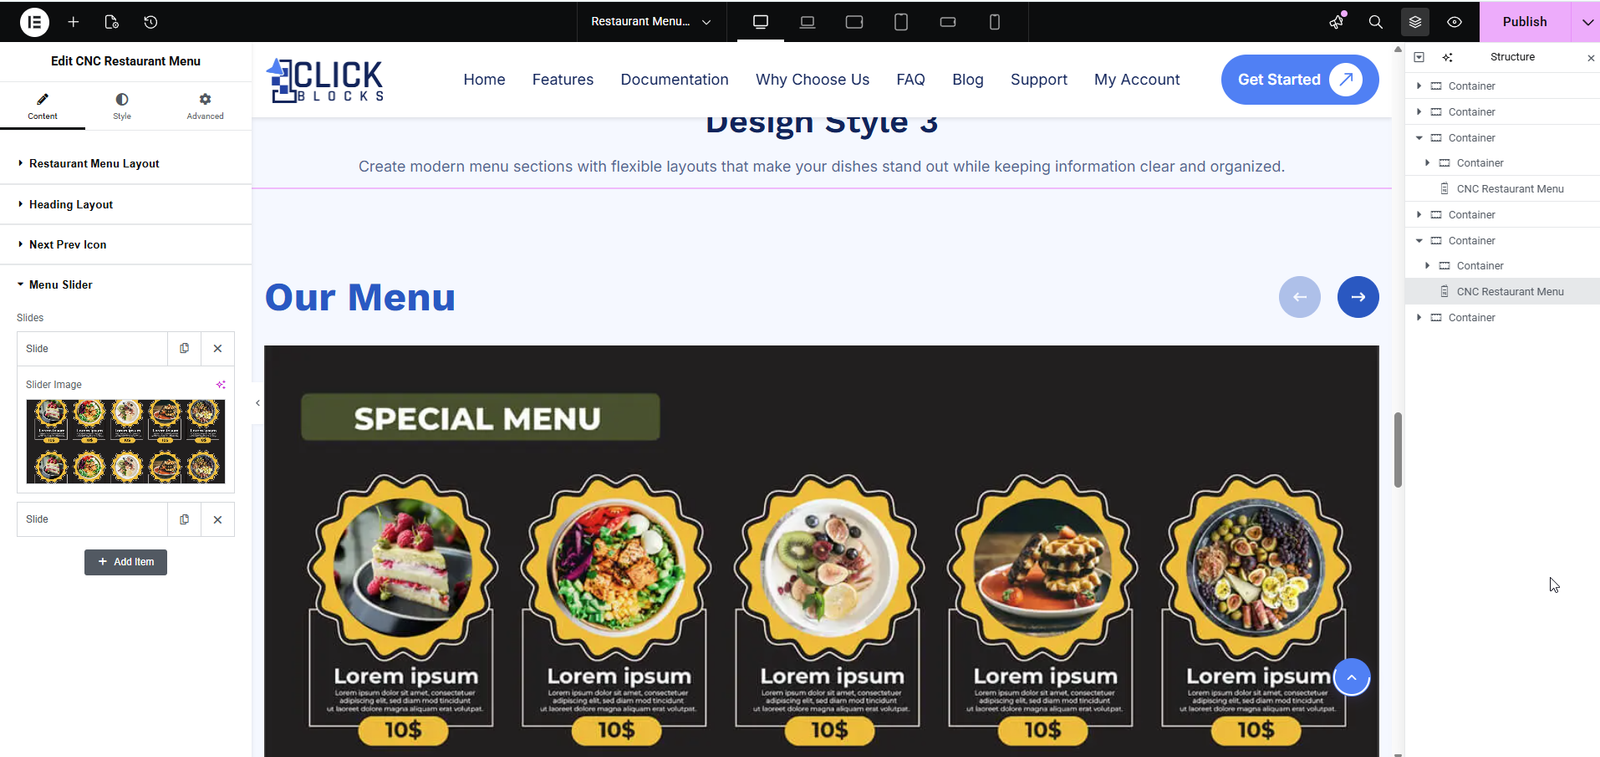
Available exclusively in Layout 4. This section allows you to upload an existing menu PDF file directly from the WordPress media library. Once uploaded, the PDF is rendered inline on the page using a built-in viewer, complete with page thumbnail navigation, zoom controls, and multi-page support. This is the fastest way to display an existing printed menu online without re-entering all items manually.